Hey, Sewists! How has your week been going? Mine has been busy, which is to be expected while in the process of uprooting one’s life to another state. I did, however, find time to stitch up another new pattern for the Breaking Ground tour Melissa is hosting. Today, I will be sharing my thoughts on the Sew Liberated – Esme Top.
I picked this pattern up at a local fabric shop in Indianapolis two years ago. Two years it has been sitting in my pattern stash just waiting to be sewn up. I have no good reason why it has gone un-sewn for so long, other than I get nervous about cutting into my indie patterns that I have spent way more money on. When I buy patterns from the big four I always do it during a sale at Jo-Ann’s, so I pay less than $2 for a pattern. When I am paying anywhere from $15-25 for a paper pattern from an indie designer I tend to be a bit more reserved with them and so they languish in my pattern stash a little bit longer than others would. Here’s to getting over that caution and trying something new!
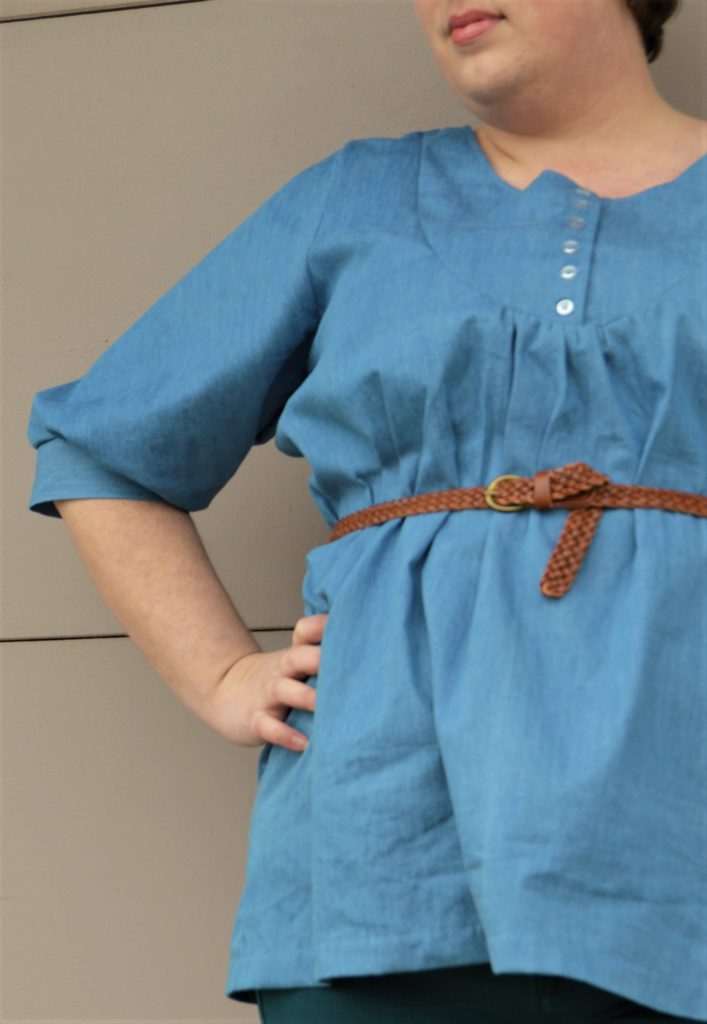
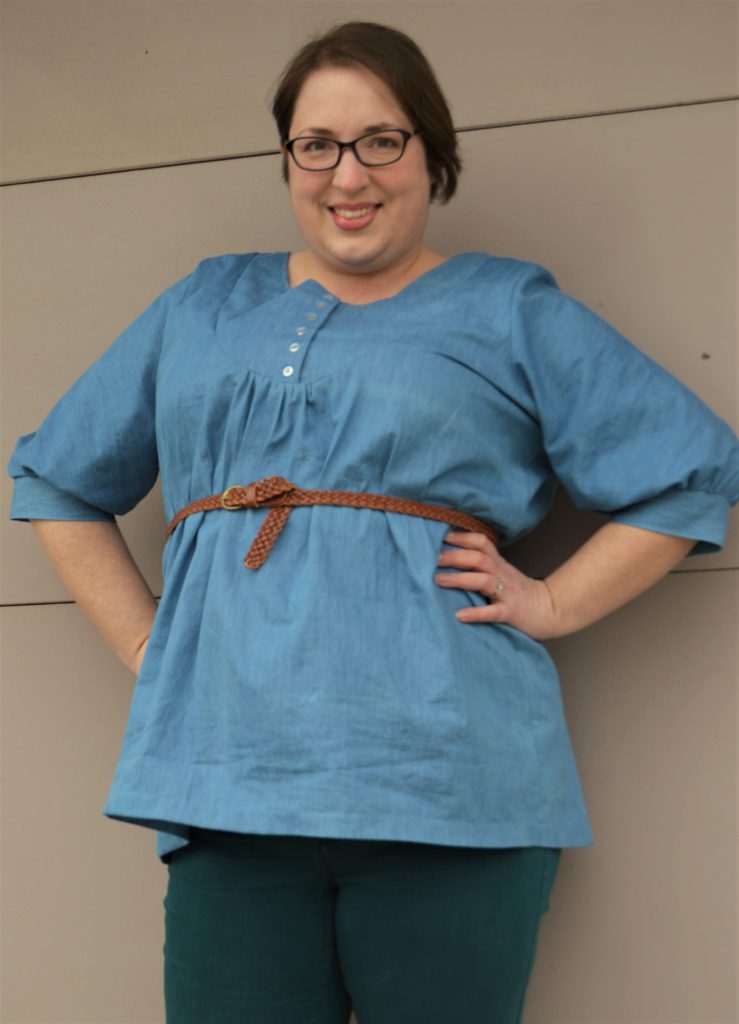
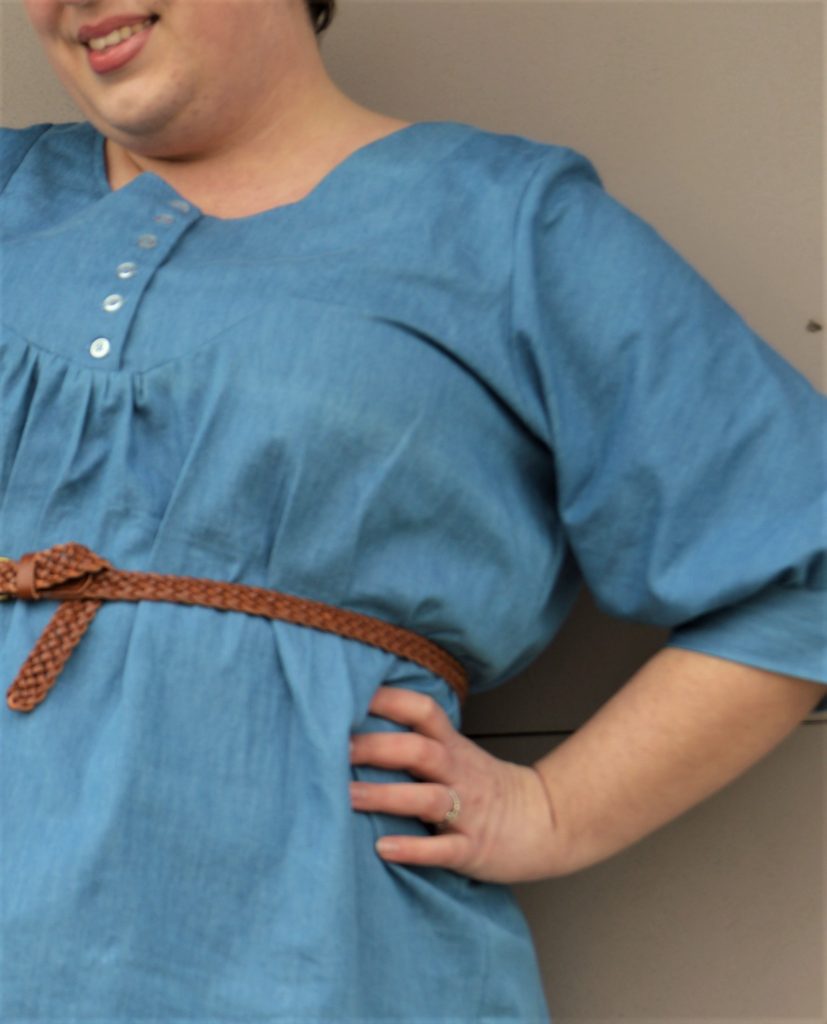
My initial attractions to this pattern were the yoke and the gathered sleeve with cuff. I like unique details and that yoke fits into that category for me. I just love that curved yoke with button detail. One of the things the instructions say is that the buttons can either be sewn through both layers of the yoke, making it a faux closure, or you could add buttonholes to make it functional. I choose to make functional buttonholes even though I will never unbutton them. It is the little details, like functional buttonholes, that I am looking to include more of in my sewing this year.
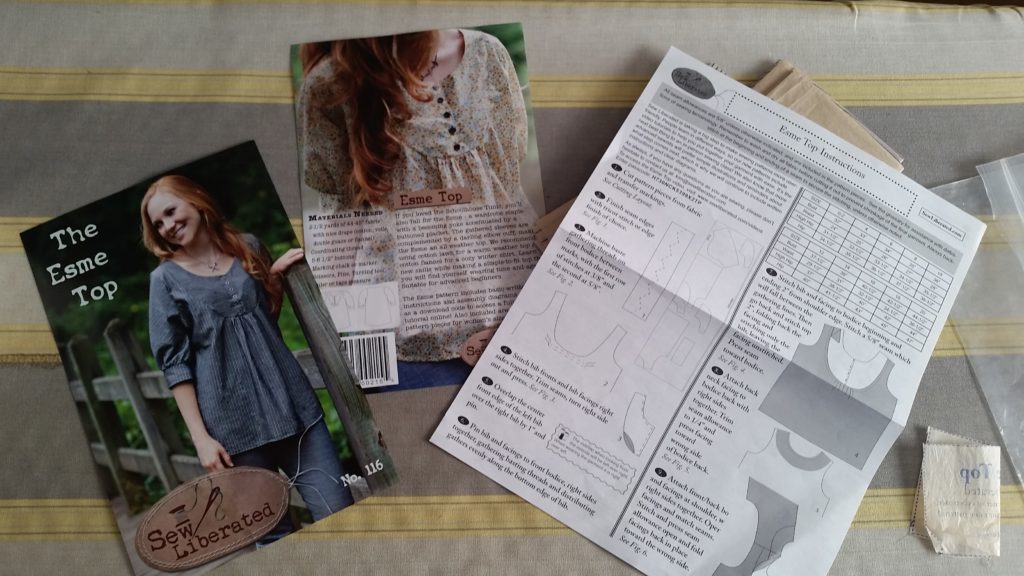
Sew Liberated patterns are unique with their packaging and instructions in that they are minimal. This is all the packaging included: a front cover, a back cover, the pattern pieces, and a single page (front and back) instruction sheet. The instructions are the basic slimmed down version for a more experienced sewer, which is great for me. They are easy to follow and the diagrams are helpful to clarify the written directions. There is also a website and access code provided that lead you to a more in-depth video tutorial. This is great for beginner sewists, as she walks you through making the top from start to finish with different tips and tricks along the way. My only critique of the video is that it needs to be updated to look more professional. The photography on the pattern envelope and the website are great and very professional. The video, unfortunately, falls short of that professional expectation for me.
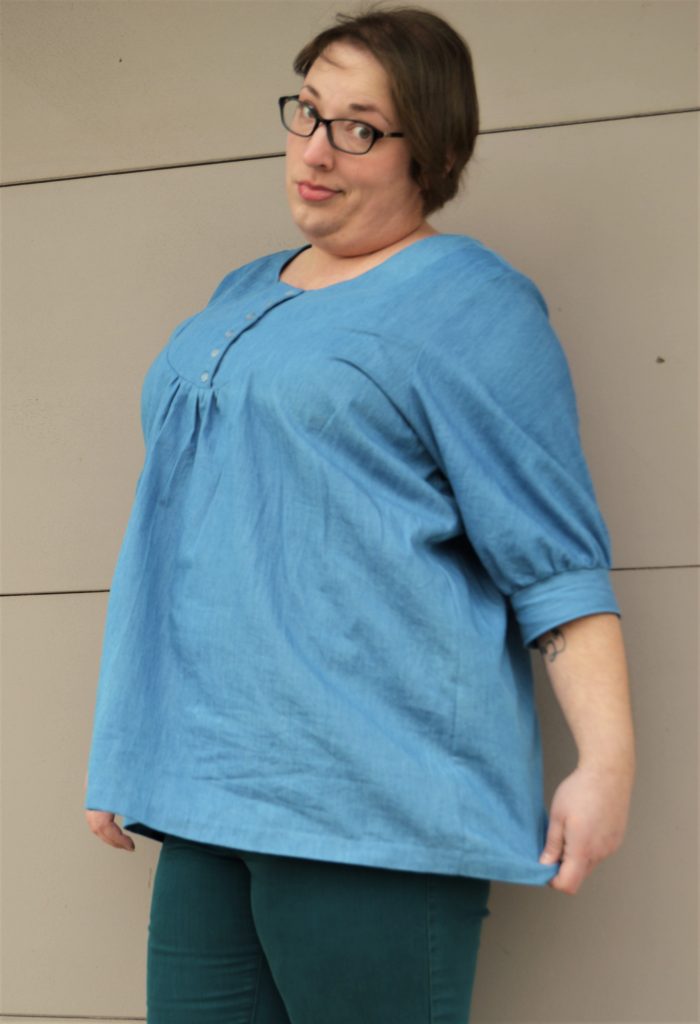
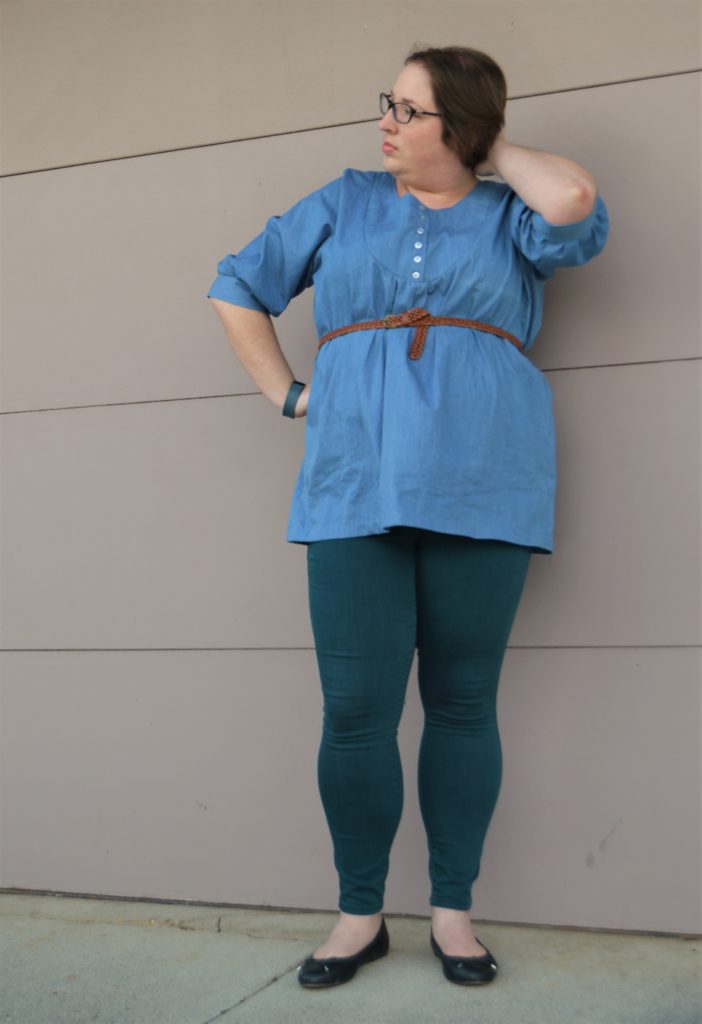
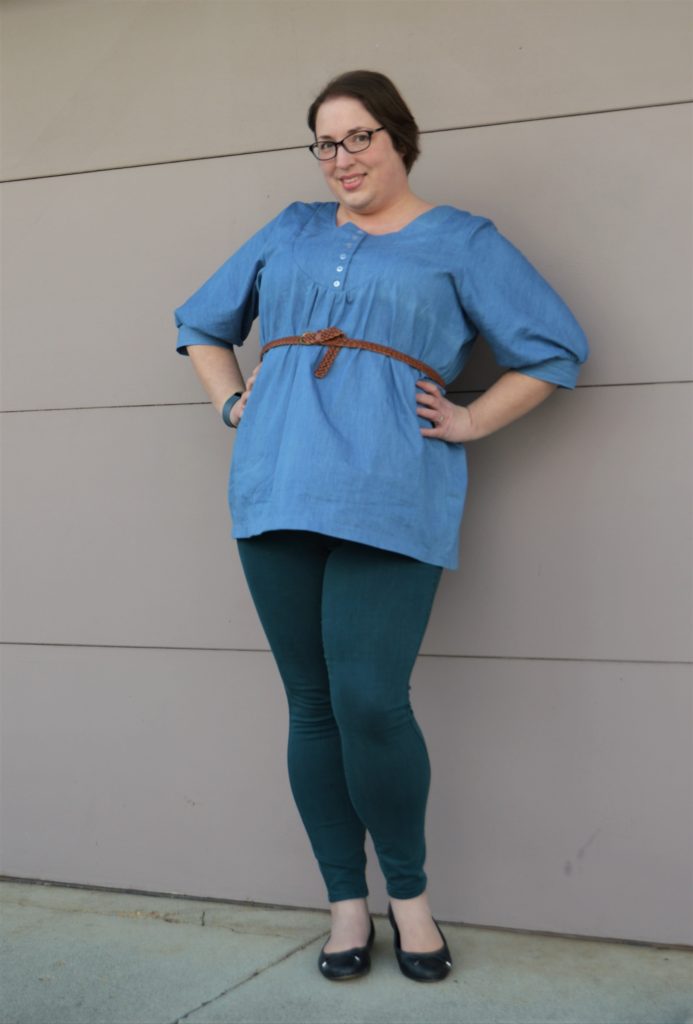
On the instruction sheet, it does have a size chart that is pretty standard with other pattern lines. It does not have finished garment measurements on either the pattern pieces or the instruction sheet, which I find disappointing. My bust measurement is 2″ bigger than the biggest size (20) on the pattern. Normally, I would consult the finished measurements to see just how much ease is in the pattern to know whether or not I should add more width to the bust. Because that finished measurement was not available to me and because of how roomy the top looked on the pattern cover and after a rough tissue fit, I choose to make the standard size 20 with no alterations. I took a risk and it ended better than it could have been. The top came out much larger in the bust than expected. I probably could have made a size 18 and still had enough bust room. As it is now when I wear it unbelted the side view is not pretty and I look like I am wearing a tent. This pretty much guarantees I will always be belting this top when worn, which is fine because I have quite the collection of fashion belts to pair with it. Below are the finished garment measurements and my personal measurements as a comparison.
Finished measurements (sz 20)
Bust:53.5″/Waist: 58″/Hip: 61.5″
My measurements
Bust: 46.5″/Waist: 42″/Hip: 48″
![]()
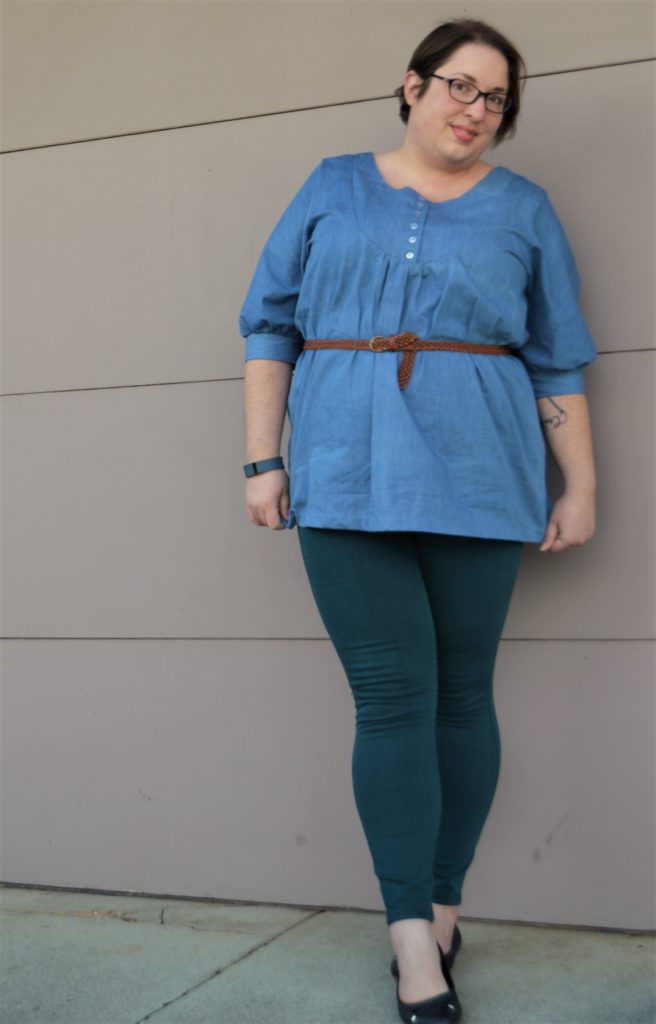
I ended up using 2.5 yards of a light blue denim chambray from Jo-Ann’s for a total cost of $12.50. This fabric has been in my stash since 2014 because I had a completely different idea of what I would be using it for. I also used six 1/2″ buttons from my button stash. This whole project has been an all around stashbusting success! I am going to enjoy wearing this top as it is just basic enough that I can wear it with any of my colorful jeggings and fashion belts. The neckline also gives me plenty of options for different necklaces making the outfit possibilities virtually endless. I would like to make it again with a stripe or plaid fabric. The sleeve is on the bias and the yoke can be turned on the crossgrain, so I think there are some opportunities to really make those details stand out with a directional fabric choice.

Have you tried a Sew Liberated pattern? What were your thoughts on it?
Check out the rest of this weeks tour participants:
Monday March 20- Anne-Mari Sews, Sewing By Ti, Musings of A Seamstress, Tenille’s Thread, Couturious, Embrace Everyday, Sewing A La Carte
Tuesday March 21- mahlicadesigns, Kaleidothought, Ronda B Handmade, Elizabeth Made This
Wednesday March 22- Rainy Day Sewing, Anne-Mari Sews, Sprouting Jube Jube, Sewing A La Carte, Tales of a Tester
Thursday March 23- mahlicadesigns, Lulu & Celeste, Very Blissful, Sprouting Jube Jube, Ronda B Handmade, Adventures with Bubba and Bug
Friday March 24- Anne-Mari Sews, Tales of a Tester, Sewing By Ti, Musings of A Seamstress, Harper + Lu, Sewing A La Carte
[…] sure to check all the other todays bloggers too! Anne-Mari Sews, Tales of a Tester, Sewing By Ti, Musings of A Seamstress, Harper + Lu, Sewing A La Carte, Sprouting Jube Jube, Lulu & […]
[…] Sews, Tales of a Tester, Sewing By Ti, Musings of A Seamstress, Harper + Lu, Sewing A La Carte, Sprouting Jube Jube, Lulu & […]
can you share the finished measurements of your size 20 top? I have not sewn anything from them but I love this top and have some fabric in mind for something like this! Looks great belted and thanks for sharing!
Absolutely! To give you a better understanding of how big it is, I am also including my personal measurements. I added both sets of measurements to the post.
Thanks!! Wow, that is a very roomy top. We’re about the same size so that’s really helpful. It’s like you did my muslin for me! LOL
Haha…you’re welcome!
[…] Sews, Tales of a Tester, Sewing By Ti, Musings of A Seamstress, Harper + Lu, Sewing A La Carte, Sprouting Jube Jube, Lulu & […]
Looks great belted. I wonder if using a drapier fabric would make your next version a little less tent like? I’ve not used Sew Liberated before and when I saw your first pic, I thought I could hack my Margo pattern from Blue Dot Sews to get a similar look.
It sure is a tricky balance between making instrustions for experienced sewers and beginners.
Thanks! It may be better. It was pretty windy out when I took pics so it may be a bit exaggerated. I want to try a lightweight shirting cotton next time. You know, I bet you could hack the Margo. The yoke is similar.
It looks like it will be a very versatile wardrobe piece for you! Not having the finished measurements would be a bit frustrating, so I’m glad the sizing worked out OK.
Thanks! I am excited to make a plaid version out of shirting cotton once we are finished moving.
You look great in your top. I’m just going to follow you, so I know what I’m making for myself next LOL.
Haha…Go for it. That’s what I am here for.
It may not have turned out perfect, but I do think this pattern has promise. I’d definitely go with a smaller size (the front neckline gaping would drive me nuts) and a drapier fabric. Good luck with your next try!
Thanks! I actually didn’t notice how much gaping it did until I started editing photos.
I think it’s a cute style for sure, and yes! You can definitely get away with sizing down. 🙂 I think I’ve seen this pattern floating around out there.
And YES I HATE when finished sizes are not included in the garment charts. It’s one of those things (along with PDFs that don’t have what pages to print for which options) that can make me avoid buying from them again.
Thanks! Yes and yes! I agree completely!
Wow. This one is great. The color of the fabric is so beautiful. Wearing it with a belt gives it a complete new look.
This looks great on you, and I actually love it without the belt too. i don’t think it looks like a tent, i think the yoke gathers are best focussed when its not belted. and I love both your favorite features too, the yoke and those gathered cuff sleeves. I am sure a smaller size would look lovely on you!
The top looks great on you. The belt makes your waist higher that perfect fit to you. I have fat hip, so I always love to wear loose fitting tops and hide it.
look great on you,cotton linen fabric seems better for you,cool this summer, http://www.alneed.com
Nice post! The blue cotton top works well with the belt, all this picks are great!
https://evatrends.com/